Preparing Self-Tanner with Loofah: How to Keep Your Tan Even and Long-Lasting
Share
Why Self-Tanner Goes on Unevenly — and What to Do About It
You know how it goes: you apply self-tanner carefully, wait patiently for the result — and the next morning your knees, elbows, and ankles are darker than the rest of your body. That's not a mistake in application; it's a preparation problem. Dead skin cells accumulate on rough areas of the body and soak up the active ingredient DHA like a sponge — the result: unsightly patches.
The solution is surprisingly simple: a loofah as an exfoliation step before applying self-tanner. Anyone who uses their loofah regularly creates a smooth, fresh skin surface — and the self-tanner adheres much better, looks more natural, and lasts noticeably longer.
What a Loofah Exfoliation Does Before Self-Tanner
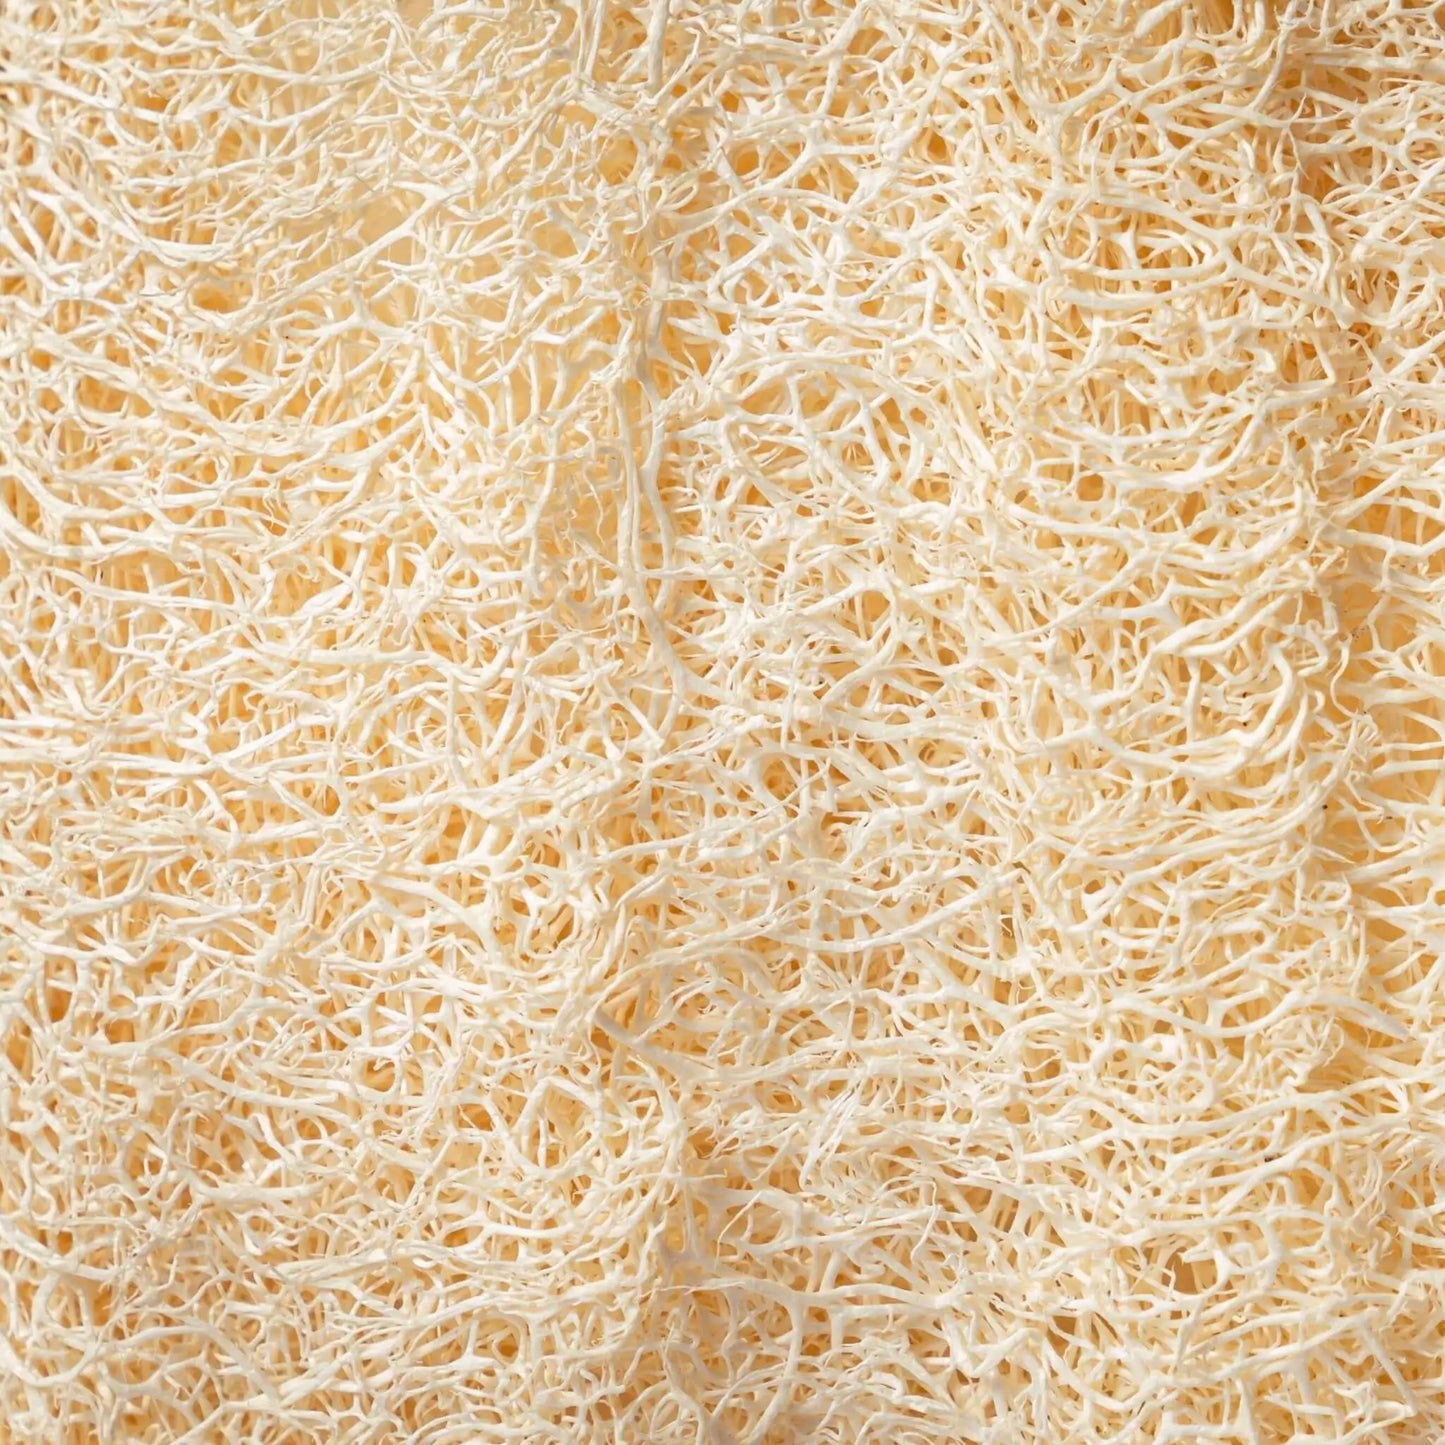
A loofah sponge is made from the dried fibres of the luffa plant — a natural gourd with a unique fibre structure. This rough yet flexible structure gently lifts the top layer of dead skin cells during exfoliation without irritating the skin.
Here's what loofah exfoliation specifically does before self-tanner:
- Even surface for application: Dead cells on knees, elbows, and ankles are removed so the DHA in your self-tanner absorbs evenly.
- More intense colour: Freshly exfoliated skin takes up self-tanner more deeply — the tan looks more natural and richer.
- Longer-lasting results: Because the tanner penetrates into deeper cells that haven't yet started to shed, the colour lasts longer.
- Less touch-up work: You save yourself the hassle of correcting and blending problem areas.
Step-by-Step: How to Prepare with Your Loofah Sponge
The preparation takes just a few minutes and is worth it every time. Here's the ideal routine:
The Day Before Self-Tanner: Exfoliation
- Shower as usual with warm water — warmth opens pores and softens dead skin cells.
- Soak the loofah briefly under running water until it becomes pliable.
- Add a mild shower gel or bar soap to the loofah — no oil at this stage, as oily residue can reduce the self-tanner's adherence.
- Exfoliate the whole body in gentle circular motions: legs, arms, stomach, back.
- Pay extra attention to the inner and outer knees, elbows, ankles, and heels — the problem areas for uneven tanning.
- Rinse the skin thoroughly and pat dry gently.
- Do not apply rich body lotion — finish the exfoliation day without moisturiser so that the skin is optimally receptive.
The Next Day: Applying Self-Tanner
- Apply self-tanner evenly to freshly exfoliated skin — circular motions help avoid visible lines.
- Apply only a very thin layer to knees, elbows, and ankles; alternatively, dampen them lightly with a thin moisturiser beforehand.
- Wash hands immediately after application.
- Wait at least 6–8 hours before showering again.
> Tip: If you don't want to do a full-body exfoliation before self-tanner, it's enough to at least prepare the problem areas (knees, elbows, ankles) with the loofah.
How Often and When to Exfoliate?
| Situation | Recommendation | |---|---| | Before first self-tanner application | Full body exfoliation with loofah | | Refreshing self-tanner (every 3–4 days) | Light exfoliation on problem areas | | Removing self-tanner | Intensive exfoliation with loofah + shower gel | | Regular summer skincare | 2–3× per week loofah routine |
Important: Always exfoliate the day before self-tanner — not on the same day. The skin needs a few hours to "settle" after exfoliation.
Removing Self-Tanner Evenly — the Loofah Is Perfect for That Too
When your tan starts to fade unevenly after a few days, the loofah comes back into play. A thorough exfoliation dissolves old tan residue and creates a clean surface for the next application. So you don't need any special self-tanner removers — the loofah does it naturally.
Which Self-Tanners Work with Loofah Preparation?
Loofah preparation works with all common self-tanners:
- Lotions and creams (most common) — benefit most from exfoliation
- Self-tanner mousse — absorbs even more evenly on exfoliated skin
- Self-tanner drops (mixed into serum) — an even base is especially important
- Gradual tanner (layered build-up) — regular loofah exfoliation between applications ensures a natural finish
Not suitable for: bronzing shower gels or instant tanners — these don't need prior exfoliation as they have no chemical tanning effect.
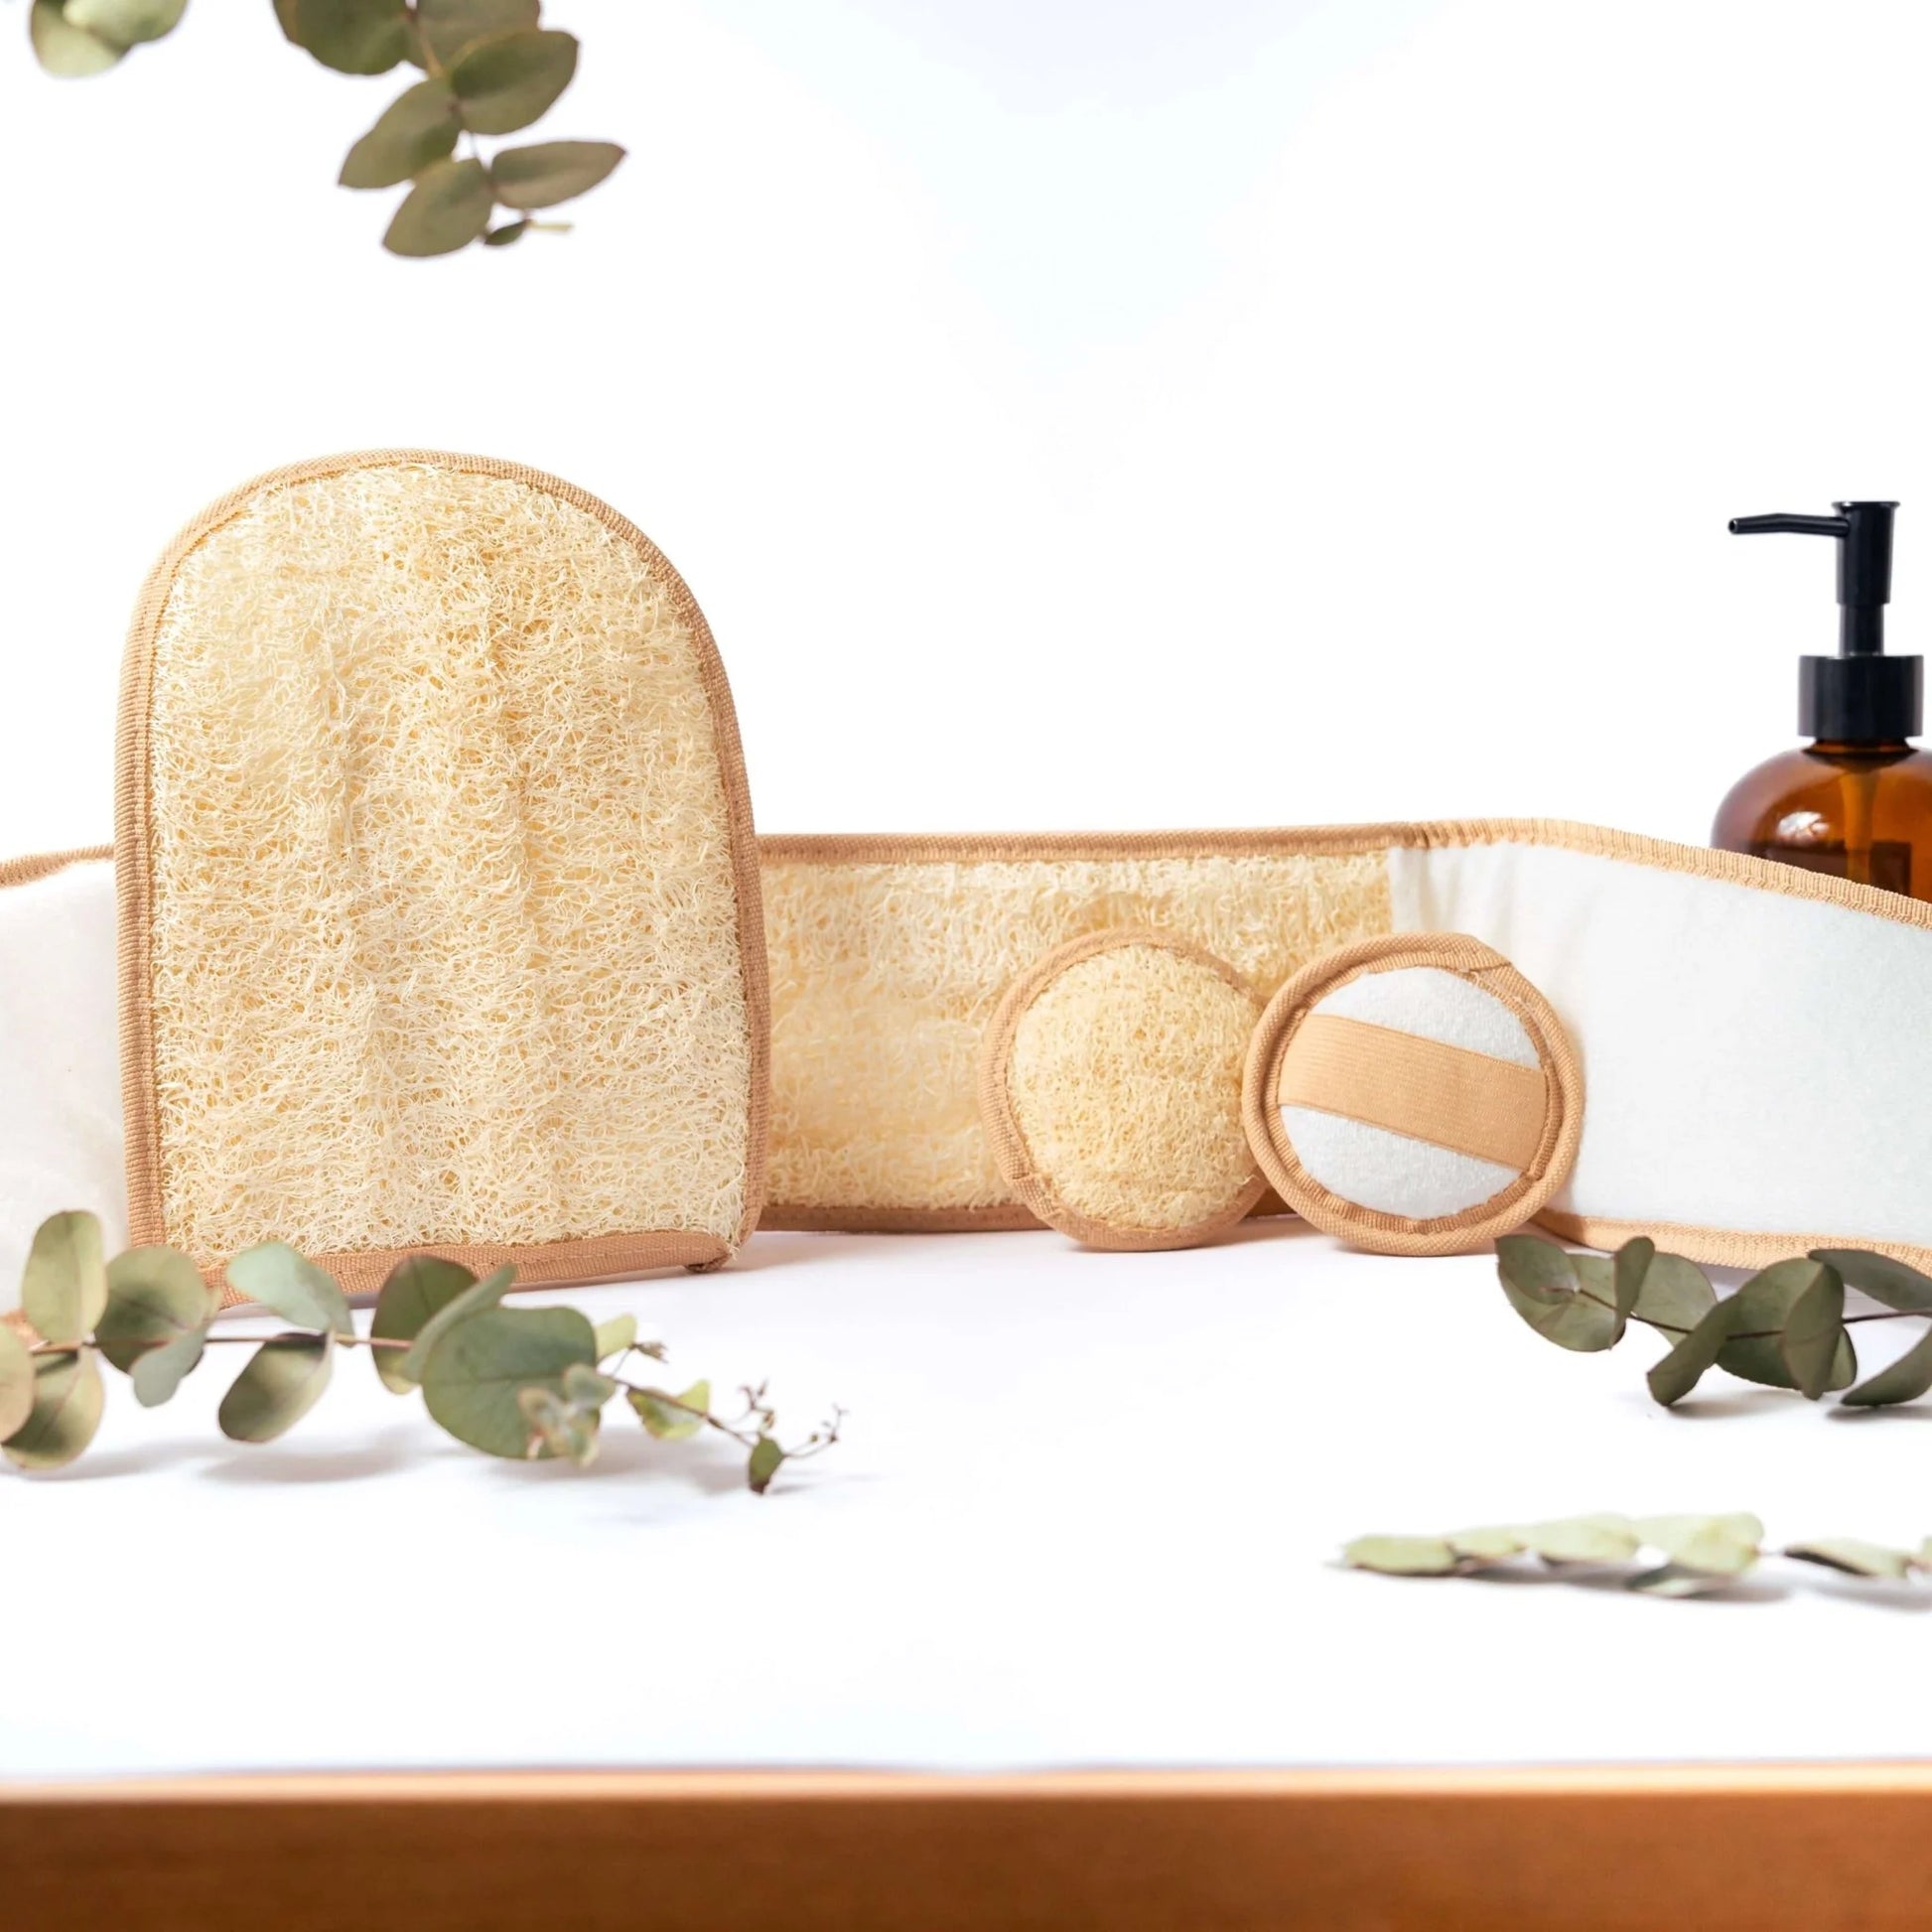
Which Loofah Works Best?
Not all sponges are created equal. For self-tanner preparation, we recommend:
- Natural loofah sponge (from the real luffa plant): The fibre structure is evenly textured and gently removes dead skin cells without irritating the skin.
- Medium firmness: Too soft = no effective exfoliation; too firm = skin irritation that makes the tanner patchy.
- A handy back loofah or glove version for the back and hard-to-reach spots.
Synthetic sponges made of plastic or polyester have a different fibre structure and exfoliate less evenly. A real loofah is the better choice here — and on top of that, it's biodegradable.
Common Mistakes in Self-Tanner Preparation
- Exfoliating right before applying: The skin is still sensitised and takes up the tanner unevenly.
- Too aggressive exfoliation: Micro-injuries lead to patches in the result.
- Body oil before tanner: Oil creates a barrier that prevents DHA from penetrating.
- Missing problem areas: Creaming knees and elbows too heavily despite exfoliation.
- Storing sponge wet: A permanently damp loofah breeds bacteria — always shake out well and let it air-dry.
FAQ: Loofah & Self-Tanner
Can I use the loofah on the same day as self-tanner? Better not. Exfoliation leaves the skin slightly sensitised. Applying self-tanner directly afterwards can lead to uneven pigmentation or redness. Plan at least 12–24 hours between exfoliation and application.
How often should I exfoliate before self-tanner? Once before each application is enough. With regular use (e.g. refreshing every 4–5 days), it's sufficient to lightly exfoliate just the problem areas like knees and elbows in between.
Is loofah exfoliation suitable for sensitive skin? Yes, with some adjustments. For very sensitive skin, use a softer loofah or a luffa glove and apply light pressure. No exfoliation on freshly shaved skin or active irritations.
Does exfoliation lighten the skin and remove my self-tanner? Exfoliation only removes the top layer of dead cells. If your self-tanner is fresh (1–2 days old), a normal loofah exfoliation should only slightly reduce the tan. If it's older and starting to flake, a more intensive exfoliation helps remove it evenly.
How do I care for my loofah sponge after use? Shake it out well, rinse under clean water, and dry it in a well-ventilated spot — not in the damp shower. Disinfect briefly in hot water or diluted vinegar water every 1–2 weeks. Replace after 6–8 weeks at the latest.
Conclusion: Exfoliation Is the Easiest Trick for Perfect Self-Tanner Results
A loofah sponge takes just a few minutes of preparation — and the difference in results is huge. An even tan, barely any patches on knees and elbows, more intense colour, and longer-lasting wear: that's not a coincidence, it's the result of well-prepared skin. With loofah as your natural exfoliation tool, you get the most out of your self-tanner — no chemicals, no extra products needed.
👉 Discover our loofah sponges and give your skin the perfect base for a flawless summer glow.